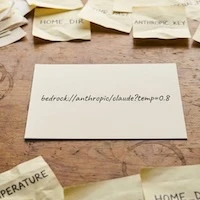
Using Environment Variables in NodeJS
Using `dotenv`

Handling Secrets & API Tokens Safely
Related Article: Protect Your Tokens
Let’s quickly recap the difference between secret and non-secret.
- 🔒
Secret keysMUST use a custom server (e.g. Node/Express/Heroku) in order to hide (proxy) requests to 3rd party API services. - 🌍
Non-secret keysdescribes keys which can be sent to the browser.
We’ll focus on dealing with 🔒
Secret keysusing Environment Variables in this article.
Code examples are included below.
Overview
To safely access secrets in your NodeJS code:
- Replace hard-coded keys with environment variables. e.g.
process.env.API_SECRET - Use a library like
dotenvalong with a.envfile. Add your previously hard-coded secrets to the.envfile. - Verify
.envline in your.gitignorefile!
DON’T create a
.envfile on deployed servers. Use your hosting services’ (e.g. Heroku, Netlify, AWS EC2) provided environment variable management tool: e.g. dashboard or command line.
Code Example
We’re going to define a few files.
.env./db/connection.js./api/users.js
First, install the dotenv package.
npm install dotenvNext, create a .env in the root of your project.
PGDATABASE="postgres"PGHOST="localhost"PGPORT=5234PGUSER="postgres"PGPASSWORD="password"❌ NEVER commit .env file.
❌ Avoid creating .env on servers.
Check your Hosting Provider docs to set up environment variables.
To easily make sure your .gitignore has a .env line in it.
# Automatically update .gitignore# Run in terminal:[ "$(grep '^.env' .gitignore)" == "" ] && echo '.env' >> .gitignore# note: no output will printThe ./db/connection.js provides a shared pg.Pool instance. It’ll be used to query the database.
require('dotenv').config(); // ✅ Load .env fileconst pg = require('pg');const {PGUSER, PGHOST, PGPORT} = process.env;
if (process.env.NODE_ENV === 'development')  console.log(`Connecting to ${PGUSER} @ ${PGHOST}:${PGHOST}`);// ^^ only for showing debug connection vars
// pg automatically uses PG* env variablesmodule.exports = new pg.Pool();
The ./api folder contains interfaces to your tables/views.
Here’s an example ./api/users.js for the users table.
const db = require('../db/connection.js');
module.exports = { findUsername: function(username) { return db.query('SELECT * FROM users WHERE username=$1', username); }};- Never commit your
.envsecrets to git! - Don’t share
.envfiles on a team. *
* Every new development laptop or desktop should generate new access keys & tokens.
If it’s not possible, use plenty of care sharing your .env (in cases where a service might invalidate all older keys, or you have a paid API’s limited access token.)
⚠️ Important: if necessary, always use a secure messaging service (preferably with expiring message support.)
Good luck and let me know if you have any questions! 🎉


